 Bellingham Roofing
 Storm Damage Roof Repair for Puget-Area Homes
Homes in and around Puget deal with a specific combination of weather that most roofing marketing never talks about honestly. You're close enough to the water to catch salt-laden air and wind-driven rain off the Sound, but you're also under enough tree cover in most yards to get heavy moss growth for a good chunk of the year. Add in the wind gusts that come through during winter storm systems, and a roof out here is working harder than a roof in a drier, more sheltered part of Whatcom County. Storm damage repair in this area isn't just about patching what a single bad night did to your roof — it's about fixing the damage in a way that accounts for everything the roof is going to keep facing afterward.
This page covers what storm damage actually looks like on a Puget-area roof, what a repair needs to include to hold up, and how our process works from the first call to the final inspection.
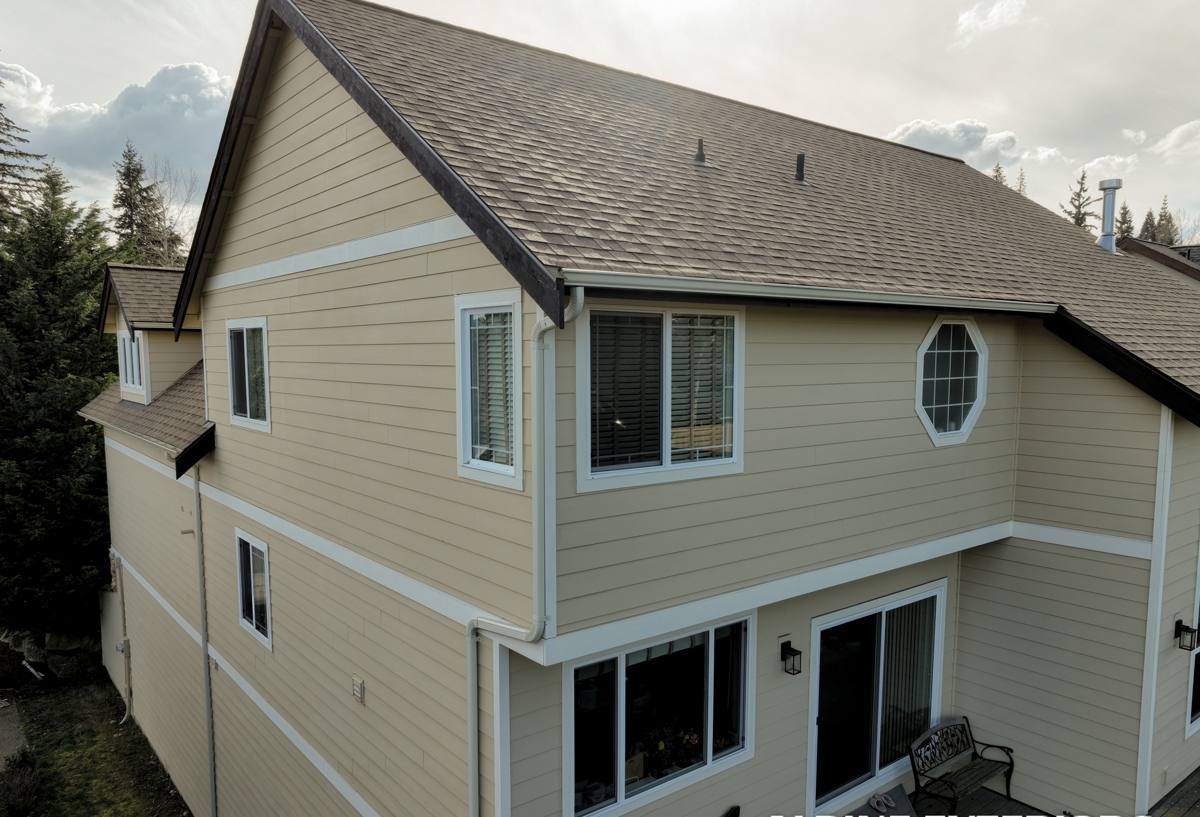
What Bellingham Weather Does to a Roof Over Time
Storm damage rarely shows up as one dramatic event. More often it's an accumulation — a windstorm lifts a few shingle tabs, driving rain gets underneath before anyone notices, and moss that's been building for a season or two holds moisture against the roof deck longer than it should. By the time a leak shows up inside the house, the underlying damage has usually been developing for a while.
Salt Air and Corrosion
Proximity to Puget Sound means metal roofing components — flashing, fasteners, vent caps, gutter hardware — are exposed to salt-laden air that accelerates corrosion compared to inland parts of the county. Cheaper or mismatched metal flashing tends to show rust and pitting years before it would elsewhere, and once flashing starts to fail, water finds its way into the roof assembly at valleys, chimneys, and wall intersections.
Driving Rain and Wind
Storms coming off the water don't just drop rain straight down — wind pushes it sideways, up under shingle edges, and into any gap in the roofing system that wouldn't be a problem in a calmer climate. This is why storm damage here often shows up at the edges: rake edges, eaves, and anywhere the roofline breaks. A roof that's fine in a light rain can still leak in a sideways storm if the underlayment and flashing details aren't done right.
Moss and Trapped Moisture
Bellingham's long wet season and shaded lots are close to ideal growing conditions for moss. Moss holds water against shingles and roof decking far longer than an open, sun-exposed roof would dry out, which softens shingles, degrades granule protection, and can work its way under tabs and flashing over time. A storm that would be a minor issue on a clean roof can turn into a real leak on a roof with heavy moss buildup, because the moss has already compromised the roof's ability to shed water properly.
Signs of Storm Damage to Watch For
Some storm damage is obvious. A lot of it isn't, especially from the ground. After any significant wind or rain event, it's worth doing a basic visual check, and calling for a proper inspection if you see any of the following:
- Shingles that are lifted, curled, cracked, or missing entirely, especially near roof edges and valleys
- Granules collecting in gutters or at the base of downspouts after a storm
- Visible gaps or bent sections in flashing around chimneys, vents, or skylights
- Water stains or discoloration on interior ceilings or upper walls
- Sagging or soft spots anywhere on the roof plane
- Debris — branches, needles, moss clumps — built up in valleys where water is meant to flow freely
- Gutters pulling away from the fascia or overflowing during rain
- Daylight visible through the roof deck from inside an attic or crawlspace
Not every item on that list means you need a full repair, but any of them is a reason to get an inspection rather than wait and see what the next storm does.
What a Correct Storm Damage Repair Involves
A repair that only addresses the visible symptom — say, replacing a handful of missing shingles — without checking what's underneath is a repair that's likely to need redoing after the next storm. A correct repair works through the roof system in order.
Deck Inspection First
Before any new material goes down, the roof decking underneath needs to be checked for soft spots, rot, or delamination. Plywood or OSB that's absorbed water from a prolonged leak won't hold fasteners properly and won't support new shingles the way it should. Any compromised decking gets replaced before anything else happens — covering over damaged decking is one of the most common shortcuts that leads to a repair failing early.
Underlayment and Ice-and-Water Protection
The underlayment is the roof's backup barrier if wind-driven rain gets past the shingles, which happens more often here than in drier climates. In vulnerable areas — eaves, valleys, around penetrations — a self-adhering waterproof membrane provides a second line of defense that ordinary felt underlayment doesn't. On storm repairs, this is a detail worth getting right the first time rather than relying on shingles alone to keep water out.
Flashing Done Properly
Flashing is where the majority of storm-related leaks actually originate, not the open field of the roof. Step flashing at walls, counter-flashing at chimneys, and valley metal all need to be correctly lapped and sealed — not just caulked over an old, corroded piece. Given the salt air exposure in this area, we pay particular attention to flashing material and installation quality here, since a flashing repair that fails in three years because of corrosion isn't really a repair.
Matching Materials
Where a repair is patching in a section of an existing roof rather than replacing the whole thing, matching the shingle profile, color, and weight as closely as possible matters both for appearance and for performance — mismatched shingle thicknesses can create an uneven surface that collects water instead of shedding it.
Ventilation Check
Storm damage repairs are also a good moment to confirm the attic is ventilating properly. Poor ventilation traps moisture, which compounds every other issue on this list — it accelerates decking rot, feeds moss growth, and shortens the life of new shingles. A repair that ignores ventilation is treating the symptom while leaving the underlying condition in place.
Our Storm Damage Repair Process
- Emergency stabilization. If there's active leaking or exposed decking, our first priority is a tarp or temporary seal to stop water intrusion before anything else.
- Full inspection and documentation. We walk the roof (not just the ground-level view), check the attic from inside where accessible, and photograph the specific damage — this documentation is also what you'll need for an insurance claim.
- Written scope and estimate. You get a clear explanation of what's damaged, what needs to be repaired versus replaced, and an honest cost range before any work starts.
- Insurance coordination if applicable. If the damage is being claimed through your homeowner's policy, we provide documentation the adjuster needs and can walk the roof with them if requested.
- Repair work. Deck repair, underlayment, flashing, and shingle work performed in that order, using materials matched to the existing roof where we're doing a partial repair.
- Cleanup and final walkthrough. Debris and old materials removed, and we walk the completed repair with you so you know exactly what was done.
Repair or Replacement: How We Decide
Not every storm-damaged roof needs to be replaced, and not every roof can be reasonably repaired. We look at the roof as a whole system before recommending either path.
| Factor | Points Toward Repair | Points Toward Replacement |
|---|---|---|
| Age of roof | Well within expected service life | Already near or past expected service life |
| Extent of damage | Isolated to one section or slope | Widespread across multiple slopes |
| Decking condition | Solid, no rot or soft spots | Significant rot or repeated water damage found |
| Moss and granule loss | Minimal, isolated areas | Heavy moss coverage and significant granule loss overall |
| Prior repair history | First significant repair needed | Multiple past repairs in different areas |
| Material availability | Matching shingles still available | Original product discontinued, poor match likely |
We'll always give you the repair option when it's a sound long-term fix. We'll also tell you plainly if a repair is likely to be a short-term patch on a roof that's telling you it's near the end of its useful life — that's a judgment call we'd rather make honestly than sell you a repair that doesn't hold.
Materials We Use for This Climate
Given the salt air and moss exposure typical of the Puget area, we lean toward materials and details that hold up to sustained moisture rather than just looking good on installation day. That generally means corrosion-resistant flashing metal rather than the thinnest available option, self-adhering waterproof membrane in vulnerable areas instead of felt alone, and algae-resistant shingles where a full replacement is on the table — the copper or zinc granules in these shingles slow moss and algae growth, which matters a lot more here than in a drier region. We're straightforward about trade-offs: a cedar shake roof, for example, has real aesthetic appeal but demands more maintenance in a moss-prone, wet climate than most homeowners want to keep up with, so we'll walk you through that honestly rather than just installing what looks best in a photo.
Insurance Claims for Storm Damage
Wind and rain damage is often covered under standard homeowner's policies, but coverage and documentation requirements vary by carrier. A few things that help the process go smoothly:
- Get an inspection soon after the storm — some policies have time limits on filing claims
- Keep any photos you take yourself, dated if possible, in addition to what we document
- Avoid extensive DIY repair before the adjuster sees the damage, when it's safe to wait
- Ask your insurer directly about your deductible and what documentation they require
We're not a public adjuster and can't speak for your policy, but we can provide clear, photo-documented reports of roof condition and damage that make the claims conversation easier on your end.
Why Local Experience in This Area Matters
A roof crew that already works in and around Puget knows the difference between damage patterns here and what they'd see on a roof further inland or in a more sheltered part of Bellingham. That shows up in practical ways: knowing which flashing details tend to fail first in salt-air exposure, recognizing moss buildup that's past the point of simple cleaning, and understanding how wind direction off the Sound tends to concentrate damage on particular roof faces. It also means faster response after a storm — when a whole area gets hit by the same weather system, having a crew that's already familiar with the neighborhood's roof types and access makes a real difference in how quickly repairs get scheduled.
Reducing Repeat Storm Damage
A good repair addresses today's damage. A few ongoing habits reduce how much damage the next storm causes:
- Keep gutters and downspouts clear so water has somewhere to go during heavy rain
- Address moss buildup before it spreads across a full slope, not after
- Trim back tree branches that overhang the roof — they're both a physical hazard in wind and a source of shade that keeps moss growing
- Have the roof looked at after any major windstorm, even if nothing looks wrong from the ground
- Fix small flashing or shingle issues promptly rather than waiting for them to become a leak
None of this eliminates storm risk in a coastal climate like this one, but it meaningfully reduces how much damage accumulates between inspections.
Get a Free, No-Pressure Estimate
If a recent storm has you wondering whether your roof took damage, or you've already spotted something that doesn't look right, we're happy to take a look. There's no cost and no pressure attached to the estimate — just a straight assessment of what's going on and what it would take to fix it properly. Use the form below to get started.