 Bellingham Roofing
 Why Birch Bay's Waterfront Climate Is Hard on Siding
Birch Bay sits right on the Salish Sea in Whatcom County, and that shoreline location changes what siding has to deal with compared to a typical inland Bellingham lot. Homes here take on salt-laden wind coming off the water, winter storms that drive rain sideways into walls instead of straight down, and the long gray stretch of fall through spring when everything outdoors stays damp for weeks at a time. Add in the tree cover and shaded north faces common on Whatcom County properties, and you get a near-constant moss season on top of the salt and rain. Siding in Birch Bay isn't just a cosmetic layer — it's the thing standing between that combination and your wall framing, and it needs to be chosen and installed with that reality in mind.
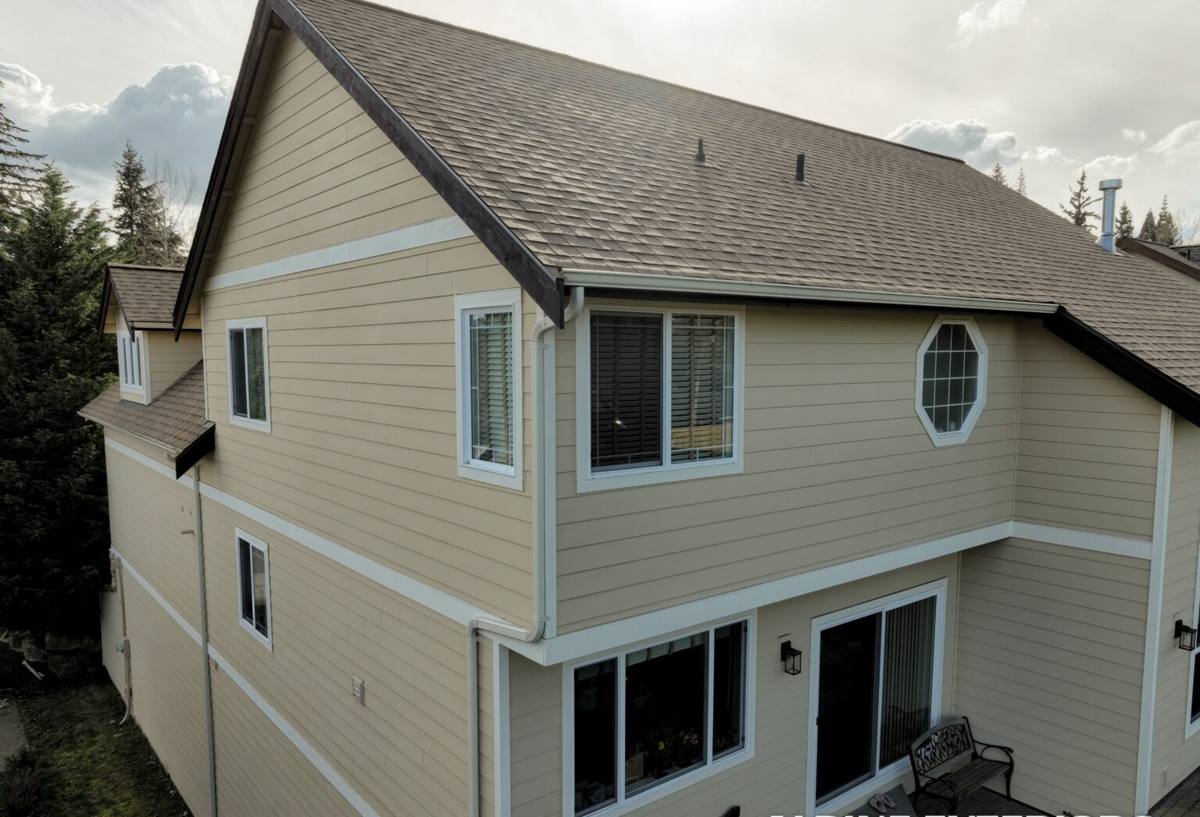
What Salt Air, Rain, and Moss Actually Do to Siding Over Time
Salt Air and Corrosion
Salt-laden air doesn't just sit on the surface — it works its way into seams, fastener heads, and any spot where the finish has worn thin. Over years, that accelerates corrosion in fasteners and flashing that aren't rated for coastal exposure, and it breaks down caulking and paint films faster than the same products would wear inland. Homes on or near the water in Birch Bay see this show up first on the walls facing the bay, since that's the side catching the most direct wind-driven moisture.
Moss, Algae, and Constant Dampness
Moss needs moisture and shade to establish, and Whatcom County's climate hands it both for a good part of the year. Once moss takes hold on a wall, it holds water against the surface far longer than open air would, which pushes dampness into butt joints, seams, and any gap in the siding's defenses. On wood-based products, that sustained contact moisture is exactly what leads to swelling and rot at the points moss collects — usually low walls, north faces, and areas shaded by trees or neighboring structures.
Why We Install Only James Hardie Fiber Cement Siding in Birch Bay
We made a deliberate decision to install James Hardie fiber cement exclusively, and it comes down to how the product performs under exactly the conditions Birch Bay produces. Fiber cement doesn't have the organic wood content that gives moisture something to feed on, so it isn't prone to the rot risk that comes with cedar, primed spruce, or wood-fiber composite products once caulking or paint maintenance falls behind — which happens on every house eventually. James Hardie also engineers specific product lines for different climate zones, including an HZ5 line built for regions with heavier moisture exposure, which fits Birch Bay's marine environment better than a one-size-fits-all siding spec.
We don't install vinyl siding, LP SmartSide, or other fiber cement brands like Cemplank or Allura, and we want to be upfront about why rather than vague about it. Vinyl is a reasonable product in the right setting, but it can warp under sustained heat and become brittle and crack-prone in cold snaps, and its overlapping panel seams give wind-driven coastal rain more opportunities to get behind the surface than a properly installed fiber cement lap system. LP SmartSide and similar wood-strand products have improved their moisture resistance over the years, but they're still an engineered wood product at the core — cut edges and fastener penetrations remain the vulnerable points, and that vulnerability matters more on a coastal lot than an inland one. Other fiber cement brands aren't a different category of risk the way vinyl or wood-strand products are, but we standardized on James Hardie for the consistency of its climate-engineered HZ line, its factory-baked ColorPlus finish, and the transferable warranty structure behind it. That standardization lets our crews install one system correctly and repeatedly rather than switching specs from job to job.
What a Correct Siding Installation Actually Involves
Water-Resistive Barrier and Flashing Come First
Almost every siding failure we get called out to investigate traces back to what's underneath the siding, not the siding itself. A continuous water-resistive barrier, properly lapped and integrated with flashing at every window, door, and penetration, is what actually keeps water out of the wall assembly. Siding sheds the bulk of the rain, but the WRB and flashing are the backup system — and on a site that takes driving rain off the water, that backup system doesn't get a pass for being "close enough."
Fastening, Clearances, and Joints
James Hardie publishes exact fastening patterns, nail types, and clearance requirements for a reason — deviate from them and you lose the performance the product is engineered to deliver. That includes keeping a minimum ground clearance so splash-back doesn't sit against the bottom course, leaving expansion gaps at trim and joints instead of butting panels tight, and never relying on caulking as the primary line of defense against water intrusion. Caulking is a detail, not a strategy, and in a climate that keeps surfaces wet as often as Birch Bay's does, a caulking-dependent installation ages badly.
Factory Finish vs. Site-Applied Paint
James Hardie's ColorPlus finish is baked on at the factory under controlled conditions, which gives it a more consistent bond and better resistance to fading and moisture intrusion than paint applied on site after installation. In a location with as much sun, salt, and moisture cycling as Birch Bay, that factory finish is doing real work — it's one less field variable that can go wrong.
| Installation Element | Done Right | Common Shortcut That Causes Problems |
|---|---|---|
| Water-resistive barrier | Continuous, correctly lapped, integrated with flashing | Gaps or poor overlap at seams and penetrations |
| Window and door flashing | Full flashing system tied into the WRB | Caulk-only sealing around openings |
| Ground clearance | Minimum clearance maintained per manufacturer spec | Bottom course installed too close to grade or hardscape |
| Panel joints | Gapped for expansion, flashed or trimmed correctly | Butted tight and sealed with caulk alone |
| Fasteners | Corrosion-resistant, correct pattern and depth | Standard fasteners overdriven or underdriven |
Our Installation Process, Start to Finish
- On-site assessment. We walk the exterior, check the condition of existing siding and sheathing, and look specifically at the walls facing the water and any shaded, moss-prone areas.
- Tear-off and sheathing check. Once old siding comes off, we inspect the sheathing underneath for rot or soft spots and address any damage before anything new goes on — covering a compromised wall with new siding just hides the problem.
- Water-resistive barrier and flashing installation. This is the step we won't rush, since it's the layer doing the real waterproofing work behind the siding.
- James Hardie installation to manufacturer spec. Panels, fastening pattern, and clearances follow James Hardie's published requirements for the product line used, including HZ5 where coastal exposure calls for it.
- Trim, joints, and controlled sealant use. Caulking gets used only where it's meant to be a detail, not a substitute for proper flashing or gapping.
- Final walkthrough. We go over the finished work with you before calling the job done.
Signs Your Current Siding Is Struggling With Birch Bay's Climate
A few visual cues tend to show up before a siding problem becomes a structural one. Worth checking for:
- Moss or algae staining that comes right back a season or two after cleaning
- Soft, spongy, or bouncy spots in the siding, especially near the ground, at corners, or below windows
- Paint that's peeling, bubbling, or chalking heavily, particularly on the side of the house facing the water
- Visible gaps at seams, trim, or corner boards where daylight or moisture can get behind the surface
- Panels that look warped, buckled, or no longer sit flush against the wall
- Rust streaking below fasteners, flashing, or trim pieces
Any one of these on its own might be minor. Several showing up together, especially on the walls that face the bay directly, usually means moisture has already found its way past the surface.
What Affects the Cost of a Siding Installation in Birch Bay
Every home is different, so we won't quote a number without seeing the site, but the factors that typically move the price are consistent:
| Cost Factor | Why It Matters |
|---|---|
| Total wall area and home size | More square footage means more material and labor |
| Tear-off vs. new construction | Removing and disposing of old siding adds time and cost that new-build installs skip |
| Existing sheathing or rot repair | Damage found once old siding is removed has to be fixed before new siding goes on |
| Trim and profile complexity | Detailed trim work, multiple siding profiles, and architectural features take more labor than a simple lap-siding wall |
| Site accessibility | Waterfront lots, slopes, and tight-access properties can add setup and staging time |
| Product line (standard vs. HZ5) | Climate-engineered product lines cost somewhat more but are matched to coastal exposure |
Why Hiring a Crew That Already Works in Birch Bay Matters
Siding installation isn't identical from one part of Whatcom County to another, and a crew that's already worked in Birch Bay has a feel for which walls on a given lot take the worst of the wind and rain, where moss tends to establish first, and how to sequence a job around the marine layer and storm patterns instead of fighting them. That local familiarity shows up in small decisions — where to be extra careful with flashing, which side of the house needs the most attention during installation — that don't come from a spec sheet alone. It also means the crew is still local and reachable if a warranty question comes up down the road, rather than having done one job in the area and moved on.
Ready for a Straight Answer on Your Siding
If your Birch Bay home is showing moss that won't stay gone, soft spots near the ground or windows, or siding that's just past its useful life, we're happy to take a look and give you a clear, honest read on what it needs. Fill out the form below for a free, no-pressure estimate — we'll assess your home's exposure and walk you through what a correct James Hardie installation would involve for your property.